Cell Range Selection
Overview
Range selection allows users to select and highlight a block of cells across rows and columns that you can then take action on.
Try some of the following on the table below:
- Select a range - Click and drag across multiple cells
- Navigate the table - Click on a cell and use the arrow keys to navigate round the table
- Expand a range - After selecting a range hold down the shift key and either drag the mouse or use the arrow keys to change the size of the selected range
- Multiple Ranges - After selecting a range, hold down the crtl key and click and drag to select additional ranges.
- Programatically Add Ranges - Click the "Select Range" button to programmatically add ranges with the addRange function.
Compatibility
This module is currently only available with the Virtual renderes and will not work with the Basic renderers
Navigation
The range module allows you to navigate around the table using the arrow keys.
Cell Navigation
When a cell has focus, using any of the arrow keys will cause the selected cell to move one cell in the direction of the arrow key pressed.
Jump Navigation
Holding the ctrl key when pressing an arrow key will cause the focus to skip to the next cell with a value in the direction you are navigating. This will skip any empty cells (if pressent) between the current cell and the next cell with a value.
Expand Navigation
Holding the shift key when pressing an arrow key will expand the current range in the direction of the arrow key pressed.
Jump Expand Navigation
Holding the ctrl and shift keys when pressing an arrow key will expand the current range to the next cell with a value in the direction of the arrow key pressed. This will skip any empty cells (if pressent) between the current cell and the next cell with a value.
Setup
To enable range selection, set the selectableRange option to true
var table = new Tabulator("#example-table", {
  selectableRange:true,
});
The selectableRange option can take one of a several values:
- false - range selection is disabled
- true - range selection is enabled, and you can add as many ranges as you want
- integer - any integer value, this sets the maximum number of ranges that can be selected (when the maximum number of ranges is exceded, the first selected range will be deselected to allow the next range to be selected).
Layout Change
changing the layout or data of the table will result in all ranges being cleared
Selectable Columns
By default you can only select ranges by selecting cells on the table. If you would like to allow the user to select all cells in a column by clicking on the column header, then you can set the selectableRangeColumns option to true
var table = new Tabulator("#example-table", {
  selectableRange:true,
  selectableRangeColumns:true,
});
Header Sorting
You cannot use column header sorting with this option, unless you set the headerSortClickElement option to icon
Selectable Rows
By default you can only select ranges by selecting cells on the table. If you would like to allow the user to select all cells in row by clicking on the row header, then you can set the selectableRangeColumns option to true
var table = new Tabulator("#example-table", {
  selectableRange:true,
  selectableRangeRows:true,
});
A good idea for a row header is to setup a header column with the rownum formatter. An example setup for a row header would be:
var table = new Tabulator("#example-table", {
    rowHeader:{resizable: false, frozen: true, width:40, hozAlign:"center", formatter: "rownum", field:"rownum", accessorClipboard:"rownum"},
    columns:[
        ... other columns ...
    ],
});
Header Sorting
You cannot use column header sorting with this option, unless you set the headerSortClickElement option to icon
Editing
Trigger Event
When using cell editors on a table that uses range selection, it is recommended to set the editTriggerEvent option to either click or dblclick
var table = new Tabulator("#example-table", {
    editTriggerEvent:"dblclick", //trigger edit on double click
});
If you leave the editTriggerEvent option on the default value of focus then you may find that cell editing is triggered every time you start a selection, which may be a problem if you are using complex editors like the list editor
Edit Focused Cell
If a cell is currently the focus of the current range selector, the pressing the enter key will trigger an edit of that cell.
While a cell is being edited, you cannot use arrow keys to navigate round the table, once the edit is complete (for example if the user presses the enter key again), then you can resume using the arrow keys to navigate.
Selection Management
As well as clicking on a row, you can trigger the selection of a range programmatically.
Range Bounds
When creating or editing an existing range programatically, you woill need to define the bounds for the selected area.
The bounds os of a selection are defined using the top-left and bottom-right cells of a selected area, the system can then calculate the cells contained in this boundry by drawing a rectangle between the two points
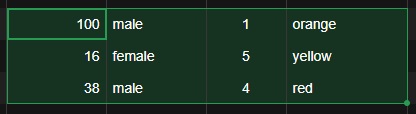
In the example above the top left cell with a value of "100" would be the start bound, and the bottom right cell with a value of "red" would be the end bound.
Add Range
To programmatically select a range of cells you can use the addRange function.
To select a range of cells you should call the addRange function, passing in the Cell Components for the top-left and bottom-right bounds of the selection:
    var topLeft = table.getRows()[2].getCells()[1];
    var bottomRight = table.getRows()[5].getCells()[6];

    var range = table.addRange(topLeft, bottomRight);
This will then return the Range Component for the new range.
Get Selected Range Components
To get the Range Component's for all the current ranges you can use the getRanges function.
var ranges = table.getRanges(); //get array of currently selected range components.
This will return an array of Range Components for all the current ranges.
Get Selected Data
To get the data objects for all the selected cell ranges you can use the getRangesData function.
var rangeData = table.getRangesData(); //get array of currently selected data.
This will return an array of range data arrays, with data array per range. Each range data array will contain a series of row data objects with only the props for cells in that range:
[
    [ //range 1
        {name:"Bob Monkhouse", age:83}, //data for selected cells in first row in range
        {name:"Mary May", age:22}, //data for selected cells in second row in range
    ],
    [ //range 2
        {color:"green", country:"England", driver:true}, //data for selected cells in first row in range
        {color:"red", country:"USA", driver:false}, //data for selected cells in second row in range
        {color:"blue", country:"France", driver:true}, //data for selected cells in third row in range
    ],
]
Clear Data
If you want the user to be able to clear the values for all cells in the active range by pressing the backspace or delete keys, then you can enable this behaviour using the selectableRangeClearCells option:
var table = new Tabulator("#example-table", {
      selectableRangeClearCells:true,
});
Cleared Cell Value
By default the value of each cell in the range is set to undefined when this option is enabled and the user presses the backspace or delete keys. You can change the value the cells are set to using the selectableRangeClearCellsValue option:
var table = new Tabulator("#example-table", {
      selectableRangeClearCellsValue:"", // set cleared cells to to an empty string
});
Range Component
The range component can be used to manipulate the cells selected in a given range. This section includes an overview of some of the most important functions of the component, Full details for the range component options can be found in the Range Component Documentation
These component objects are returned from table functions like getRanges or from range based events.
var ranges = table.getRanges(); //get array of currently selected range components.
table.on("rangeAdded", function(range){
    //range - range component for the selected range
});
Update Range Bounds
You can update the bounds for an existing range using the setBounds function, passing in the Cell Components for the top-left and bottom-right bounds of the selection:
    var topLeft = table.getRows()[2].getCells()[1];
    var bottomRight = table.getRows()[5].getCells()[6];

    range.setBounds(topLeft, bottomRight);
Update Range Start
You can change the top left start edge of an existing range using the setStartBound function, passing in the Cell Component for the top left bound of the selection:
    var topLeft = table.getRows()[2].getCells()[1];

    range.setStartBound(topLeft);
Update Range End
You can change the bottom right ending edge of an existing range using the setEndBound function, passing in the Cell Component for the bottom right bound of the selection:
    var bottomRight = table.getRows()[5].getCells()[6];

    range.setEndBound(bottomRight);
Remove Range
You can remove a range by calling the remove function on the range:
range.remove();
Range Clipboard
By using the selectableRange option, along with the clipboard, and edit modules you can create a table that allows for bulk copying and pasting of data across the table.
Try some of the following on the table below:
- Editing a cell - Double click on a cell or focus on a cell and press the enter key
- Copy a cell - Click on a cell with a value in, press ctrl+c click on another cell and press ctrl+v
- Navigate the table - Click on a cell and use the arrow keys to navigate round the table
- Select a range - Click and drag across multiple cells
- Expand a range - After selecting a range hold down the shift key and either drag the mouse or use the arrow keys to change the size of the selected range
- Copy a range - After selecting a range, press ctrl+c then click on a different cell and press ctrl+v to paste the range starting from that cell
- Paste to fill - Select a cell or range with values in, press ctrl+c then select a different size range (more than one cell) and press ctrl+v. Notice how it pastes the data to fill the range, either duplicating rows and columns as needed, or hiding data that wont fit.
- Duplicating a column - Click on a column header to select a whole column, press ctrl+c, click into another column header and press ctrl+v
- Duplicating a row - Click on a row header to select a whole row, press ctrl+c, click into another row header and press ctrl+v
Range Selection
You should enable range selection with the selectableRange option (you can either restrict the number of ranges or allow as many as you like)
You should also enable column and row headers with the selectableRangeColumns and selectableRangeRows options.
You can also allow users to clear the contents of a selected range by pressing the backspace or delete keys, by enabling the selectableRangeClearCells option.
var table = new Tabulator("#example-table", {
    selectableRange:1, //allow only one range at a time
    selectableRangeColumns:true,
    selectableRangeRows:true,
    selectableRangeClearCells:true,
});
Edit
In order for the spreadsheet navigation to work smoothly, it is recomended that the editTriggerEvent option be set to either click or dblclick
var table = new Tabulator("#example-table", {
    editTriggerEvent:"dblclick", //trigger edit on double click
});
Clipboard
In order for the copy and paste functionality to work correctly, you will need to enable the clipboard with the clipboard option
You will also need to set the clipboardCopyRowRange, clipboardPasteParser and clipboardPasteAction options to range
In addition it is also worth removing column headers from the clipboards copy data using the clipboardCopyConfigoption
It may also be worth disabling the style copying if you are planning on pasting data into other spreadsheets, as it will make the output cleaner. This can be done using the clipboardCopyStyledoption
var table = new Tabulator("#example-table", {
    clipboard:true,
    clipboardCopyRowRange:"range",
    clipboardPasteParser:"range",
    clipboardPasteAction:"range",
    clipboardCopyConfig:{
        rowHeaders:false, //do not include row headers in clipboard output
        columnHeaders:false, //do not include column headers in clipboard output
    },
    clipboardCopyStyled:false,
});
Row Header
Setup the row header to function as part of the spreadsheet. To do this, disable resizability, freeze the column, set the width, center align the column and add the "rownum" formater:
var table = new Tabulator("#example-table", {
    rowHeader: {resizable: false, frozen: true, width:40, hozAlign:"center", formatter: "rownum", field:"rownum", accessorClipboard:"rownum"},
});
Columns
You should setup the defaults for your columns to disable header sorting, set a standard width, add the default editor and center your column headers, and ensure that columns can only be resized from the header:
var table = new Tabulator("#example-table", {
    columnDefaults:{
        headerSort:false,
        headerHozAlign:"center",
        editor:"input",
        resizable:"header",
        width:100,
    },
});
Events
A range of events are available for range selection. See the Range Events section for more information.